Introduction
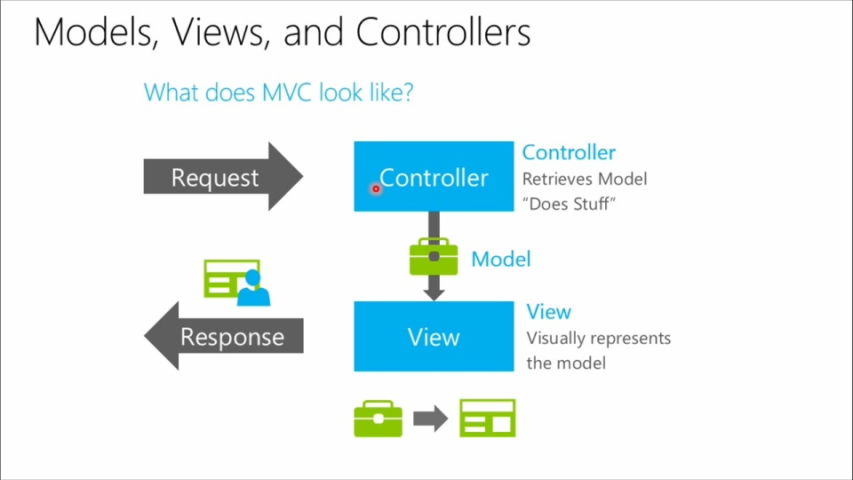
The Model View Controller (MVC) architectural pattern is a powerful and effective way to build robust, scalable web applications with ease. In the .NET framework, MVC provides a flexible and efficient means to separate concerns, ensuring a clean, organized, and maintainable codebase for developers. This comprehensive guide will walk you through the essential steps needed to create a basic MVC application using .NET technology.
Prerequisites
Before you start, ensure you have the following installed on your machine:
- Visual Studio (Community edition is sufficient)
- .NET SDK
Step 1: Create a New Project
- Open Visual Studio.
- Click on Create a new project.
- In the search bar, type ASP.NET Core Web App (Model-View-Controller) and select it.
- Click Next.
Image: Selecting the MVC project template in Visual Studio.
Step 2: Configure Your Project
- Give your project a name, such as
MyFirstMvcApp. - Choose a location for your project.
- Click Next.
- In the Additional Information window, ensure the following options are selected:
- .NET 6.0 (Long-term support)
- Configure for HTTPS
- Enable Docker (if required)
- Click Create.
Image: Configuring the new MVC project.
Step 3: Explore the Project Structure
After your project is created, you’ll see a standard MVC folder structure:
- Controllers: Contains controller classes that handle user input and interactions.
- Views: Contains the UI templates.
- Models: Contains classes that represent the data and business logic.
Step 4: Create Your First Controller
- Right-click the Controllers folder.
- Select Add > Controller.
- Choose MVC Controller – Empty.
- Name it
HomeController.
HomeController.cs:
using Microsoft.AspNetCore.Mvc;

namespace MyFirstMvcApp.Controllers
{
    public class HomeController : Controller
    {
        public IActionResult Index()
        {
            return View();
        }
    }
}
Step 5: Create a View for Your Controller
- Right-click the Views folder.
- Select Add > New Folder and name it
Home. - Right-click the new Home folder and select Add > Razor View.
- Name it
Index.cshtml.
Index.cshtml:
@{
    ViewData["Title"] = "Home Page";
}

<h1>Welcome to My First MVC App!</h1>
<p>This is your home page.</p>
Step 6: Run Your Application
- Click the Run button (or press
F5). - Your application will launch in a web browser, displaying the home page with your message.
Image: The running application displaying the home page.